MCP
As AI systems get better, they're still held back by their training data and can't access real-time information or specialized tools. The Model Context Protocol (MCP) fixes this by letting AI models connect with outside data sources, tools, and environments. This allows smooth sharing of information and abilities between AI systems and the wider digital world. This standard, created by Anthropic to bring together prompts, context, and tool use, is key for building truly useful AI experiences that can be set up with custom tools.
How it works
Currently custom tools can be configured using the Model Context Protocol standard to unify prompts, context, and tool use.
MCP Servers can be added to hub Assistants using mcpServers blocks. You can
explore available MCP server blocks
here.
MCP can only be used in the agent mode.
Quick Start
Below is a quick example of setting up a new MCP server for use in your assistant:
- Create a folder called
.continue/mcpServersat the top level of your workspace - Add a file called
playwright-mcp.yamlto this folder. - Write the following contents to
playwright-mcp.yamland save.
name: Playwright mcpServer
version: 0.0.1
schema: v1
mcpServers:
  - name: Browser search
    command: npx
    args:
      - "@playwright/mcp@latest"
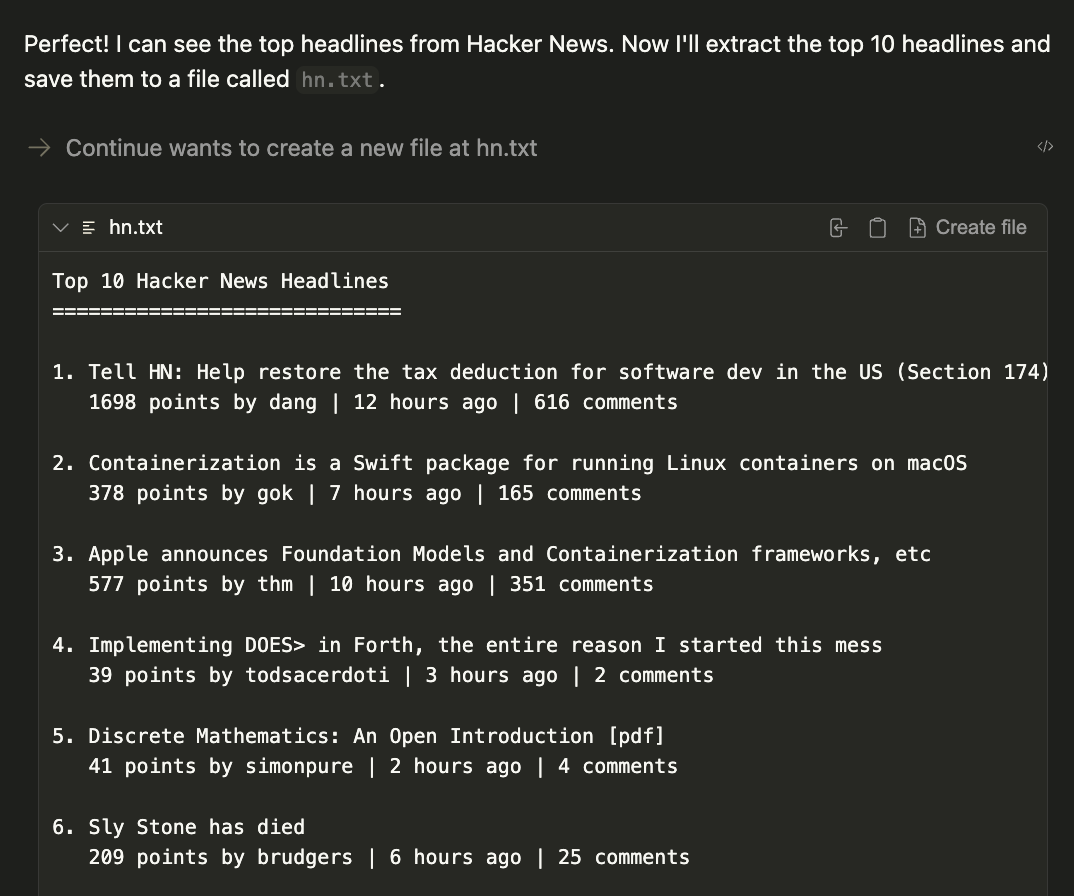
Now test your MCP server by prompting the following command:
Open the browser and navigate Hacker News. Save the top 10 headlines in a hn.txt file.
The result will be a generated file called hn.txt in the current working directory.
Using MCP Servers
To set up your own MCP server, read the MCP
quickstart and then create an
mcpServers
block or add a local MCP
server block to your config file:
- YAML
- JSON
mcpServers:
  - name: SQLite MCP
    command: npx
    args:
      - "-y"
      - "mcp-sqlite"
      - "/path/to/your/database.db"
{
  "experimental": {
    "modelContextProtocolServers": [
      {
        "transport": {
          "type": "stdio",
          "command": "uvx",
          "args": ["mcp-server-sqlite", "--db-path", "/path/to/your/database.db"]
        }
      }
    ]
  }
}
Syntax
MCP blocks follow the established syntax for blocks, with a few additional properties specific to MCP servers.
name(required): A display name for the MCP server.command(required): The command to run to start the MCP server.type(optional): The type of the MCP server:sse,stdio,streamable-httpargs(optional): Arguments to pass to the command.env(optional): Secrets to be injected into the command as environment variables.
Transport Types
MCP now supports remote server connections through HTTP-based transports, expanding beyond the traditional local stdio transport method. This enables integration with cloud-hosted MCP servers and distributed architectures.
Server-Sent Events (SSE) Transport
For real-time streaming communication, use the SSE transport:
mcpServers:
  - name: Name
    type: sse
    url: https://....
Standard Input/Output (stdio)
For local MCP servers that communicate via standard input and output:
mcpServers:
  - name: Name
    type: stdio
    command: npx
    args:
      - "@modelcontextprotocol/server-sqlite"
      - "/path/to/your/database.db"
Streamable HTTP Transport
For standard HTTP-based communication with streaming capabilities:
mcpServers:
  - name: Name
    type: streamable-http
    url: https://....
These remote transport options allow you to connect to MCP servers hosted on remote infrastructure, enabling more flexible deployment architectures and shared server resources across multiple clients.
For detailed information about transport mechanisms and their use cases, refer to the official MCP documentation on transports.
Working with Secrets
With some MCP servers you will need to use API keys or other secrets. You can leverage locally stored environments secrets
as well as access hosted secrets in the Continue Hub. To leverage Hub secrets, you can use the inputs property in your MCP env block instead of secrets.
mcpServers:
  - name: Supabase MCP
    command: npx
    args:
      - -y
      - "@supabase/mcp-server-supabase@latest"
      - --access-token
      - ${{ secrets.SUPABASE_TOKEN }}
    env:
      SUPABASE_TOKEN: ${{ secrets.SUPABASE_TOKEN }}
  - name: GitHub
    command: npx
    args:
      - "-y"
      - "@modelcontextprotocol/server-github"
    env:
      GITHUB_PERSONAL_ACCESS_TOKEN: ${{ secrets.GITHUB_PERSONAL_ACCESS_TOKEN }}